Monday, 15 August 2011

Yoga for Hair growth

If you were wondering till now that can you follow yoga for hair loss, reduce hair fall and improve hair growth, let me tell you Yoga does wonders to curb hair loss (read baldness) and improve hair growth.
Good hair makes you look wonderful, isn’t it so everyone aspires to have healthy and good hair. But in the modern world, people are finding it difficult to maintain their hair as stress, bad eating habits, pollution etc are taking a toll on their hair. Lets have a look at the common reasons for hair loss:
  • Stress
  • Hormonal disorders
  • Thyroid disease
  • Auto-immune disorders
  • Poor health
  • Poor nutrition
  • Diseases
  • Medical treatments
  • Hair treatments
According to me the most common reason for hair loss today is the stress and bad eating habits. I know its easy to say that one should stop taking stress but you gotta find out ways to reduce stress and secondly on should increase the intake of nutritious food which contains vitamins and protein. One of the best ways to reduce stress for me has been regular yoga and pranayama. And, when your stress levels are low, your overall health will be good and so would be your hair. The many types of pranayama that are helpful for your hair are Anulomvilom, Bhastrika, Bahya, Kapalbhati and Udgeeth pranayama.
Here are a few Yoga poses to counter hair loss and increase hair growth:
1. Downward facing dog pose
2. Standing forward bend pose
3. Shoulder stand pose
4. Headstand pose
5. Camel pose
Nail rubbing: Nail rubbing is an effective way to cure hair fall and increase hair growth. Nail rubbing came into popularity when Baba Ramdev talked about its benefits and also shown the fantastic results.
Nail rubbing is very simple, just fold your fingers of both the hands and place the finger nails against each other. Simply rub the nails against each other. It is advised to do nail rubbing for five to seven minutes twice a day. Nail rubbing can be done while standing or sitting as well. Baba Ramdev recommends doing nail rubbing just before sleeping and also do it in a way that sounds come from nail rubbing.
All in all if you are regular at pranayama and the above mentioned yoga poses, I am sure you would see some improvement in your hair growth.

Ramdev Yoga for Hair Growth

To begin a practice of Ramdev yoga for hair growth, you must remember to be patient and entirely devoted to the practice of anywhere from 3 to 9 months in order to assess accurate results. The various breath types and uses are of primary concern for beginners. Remember that your stomach should be empty when practicing yoga. Before breakfast is a great time for this practice since the stomach is light and empty.
Bhastrika Breath
To perform the Bhastrika breathing, take deep breaths and be sure to completely push the air out of your lungs and diaphragm. You should repeat this breathing technique for at least 2 minutes and not more than 5 minutes. Bhastrika breathing benefits your heart, lungs, nervous system and respiration. To perform the Bhastrika breathing, take deep breaths and be sure to completely push the air out of your lungs and diaphragm. You should repeat this breathing technique for at least 2 minutes and not more than 5 minutes. Bhastrika breathing benefits your heart, lungs, nervous system and respiration. Your lungs are strengthened and general health is improved because the heart and head receive adequate supplies of oxygenated blood.

KapalBhati Breath
KapalBhati Breath is often referred to as a sneeze-like breath. It is fast without being forceful. In a comfortable seated position, you tuck the chin gently toward the chest and push air in and out of the nostrils at a quickened pace. In the beginning, this technique should be tried for no more than 1 minute or 30 breaths. You can increase when you are ready, to a maximum of 15 minutes. KapalBhati breathing is said to assist with weight loss at each exhalation. Additionally, the benefits of this technique include lowering cholesterol, concentration, snoring, diabetes and constipation.


                                                                           Anulom Vilom Breath
Anulom Vilom Breath involves a specific technique that is a bit more challenging to practice because it is contrary to our natural breathing pattern. By using the left thumb, you should cover the left nostril and proceed with inhalation using the left nostril only. Then, using the index finger on the left hand, exhale using the right nostril only. It is suggested that this technique be repeated for 15 to 30 minutes. These breaths should be deep and slow. The benefits of this type of Ramdev yoga are said to affect the heart, bent ligaments, cartilage and several disorders from high blood pressure to depression.


                                                               Bhramari Breath
The word Bhramari comes from the Sanskrit name bhramar, which refers to the humming bee. Hence, the bhramari breath produces a humming-like sound. This sound tends to calm the mind, tensions, anger, anxiety and even insomnia. Beginners can start this technique by inhaling through both nostrils, and then start creating the humming sound on the exhale.
Try inhaling for 4 seconds followed by an exhale of 6 seconds through both nostrils; this can be continued for about 5 minutes. Once you have mastered the humming sound on the exhalation, try adding the hum on the inhale as well. Creating the hum while inhaling is more challenging but certainly possible with practice.

Tips
Ramdev yoga techniques may be very new to your body and elicit startling responses at first. Pay attention to your body's cues while practicing. it is normal to feel a coolness or tingling sensation in the throat. However, the proportion of the breathing should never be forced. If you feel dizzy, discontinue the practice and return to a normal, relaxed breathing pattern.

Saturday, 13 August 2011

tips for Soft Lips

Ways To Get Soft Lips 
  •  Healthy, soft, and plump lips are obtained by maintaining and increasing the moisture content. The best way to ensure your lips are well hydrated is to ensure high intake of water on a daily basis (minimum of 8 glasses or 64 ounces).
  • Avoid the urge to lick your lips when they are dry as saliva acts only as a temporary moisturizing solution but eventually causes more harm as it causes dryness.
  • Products, which include ingredients such as cocoa butter or Shea butter and vitamin E, are good sources of moisture.
  • Exfoliating is very important in getting better results as dead cells are removed and the skin is clean and ready for moisturizing. You get lip-exfoliating products such as Body Shop’s Lip Scuff, which also have moisturizing compositions.
  • Exfoliation can also be done naturally by using a soft toothbrush (different from the one you use for your teeth) to gently, scrub your lips in circular movements. Another method is by first moistening your lips and then applying sugar or salt using your finger and moving lightly in small rotations. A word of caution is not to use salt if you have cuts or wounds.
  • There are many cosmetics such as lip balms (e.g. Carmex and Burt's Bees - Beeswax Lip Balm), chap sticks (e.g. Alba) or lip creams that are available to help you get soft lips. Here too it is important you apply these products by either using your finger, or gently dabbing in circular motions to get a good outcome.
  • Margarine (butter) and honey (only pure honey) are good products for moisturizing too. Take a small amount of butter or honey and apply it gently with your finger in tiny rotations. Leave it on for one or two minutes and wipe it clean with a soft towel or tissue. You could repeat this if required.
  • Butter gives your lips that sheen and lush texture while honey adds to the plumpness of your lips. You can also use coconut juice, rose milk, olive oil, or baby oil in a similar fashion to get radiant and healthy lips.
  • At night, before you sleep apply two layers of crème or petroleum jelly such as Vaseline. Gently massage a layer in rotating motions and then apply a thicker layer on top. The second layer will be absorbed during the night and will help increase moisture content.
  • It is important to note that products over a year old, cheap products or sharing of products may pass on bacteria to your lips, which may be harmful.

Remove Lip Wrinkles Naturally

Lip wrinkles are considered to be amongst the first signs of aging to mark an appearance on your face. However, there can be other reasons accounting for your lip wrinkles, apart from age. For instance, smoking is considered to be a major reason for the appearance of lip wrinkles, as the skin of those who smoke ages faster than that of non-smokers. Lack of proper hydration and exposure to sunlight can also cause fine lines, in the form of wrinkles, on the lips. As with all health and skin conditions, prevention is far better than cure in the case of lips wrinkles as well. However, if your lips have already started showing wrinkles and you want to get rid of them naturally, read the following lines and explore some remedies for the same.

Natural Remedies For Removing Lip Wrinkles

Method 1

Requirements
  • Gentle Exfoliating Cleanser
  • Soft Cloth
  • Vitamin E Oil
  • Rich Moisturizer
  • Lip Balm with Sunscreen
  • Water

Instructions
  • It is important to remove the dead skin from your lips, as from the other parts of the body. So, go ahead and wash your lips using the exfoliating cleanser. However, do not put too much pressure, as it can result in chapped lips. Exfoliation will immediately make your lip wrinkles appear shallow.
  • Rub Vitamin E oil on the wrinkled area of your skin. Also, apply the oil to the area around your lips. Vitamin E is very effective in making the wrinkled area smooth once again.
  • Use a rich moisturizer to moisturize your lips. Follow it up with a sunscreen lip balm. This will help to hydrate the skin cells, make your lips plump and also erase the lip wrinkles in no time at all. Moisturizing also protects your skin from environmental damage.

Method 2

Requirements
  • Papaya
  • Honey
  • Toothbrush
  • Natural Oils (coconut/vitamin E/jojoba oil)
  • Cinnamon
  • Lip Balm with Sunscreen

Instructions
  • Mix mashed papaya and a small amount of honey to make a lip paste. Papayas are great in making the lips plumper. They will temporarily fill the wrinkles by bringing the blood to the surface of your lips. Apply the paste on your lips and allow it to dry. Rinse it off with water.
  • Brush your lips gently with a soft toothbrush, to increase blood circulation and remove the dead skin cells.
  • Mix a pinch of cinnamon into natural oils and apply it on your lips. This works well to hydrate your lips and keeps them wrinkle free as well. Cinnamon also increases blood circulation.
  • Apply a lip balm on your lips, the one that contains suncreen as well.

Additional Tips
  • Take care to drink plenty of water. Have at least 8-10 glasses of water in a day. It not only hydrates your skin, but also keeps your lips in a good shape. Plenty of water will help you avoid and even eliminate lip wrinkles fast.
  • Whenever you venture outside or into strong sunlight, make sure that you leave the house only after applying a lip balm with sunscreen in it. It will help to preventlip sunburn, age spots, skin and wrinkles.

Upper Lip Hair Removal

For women, having hair on the upper lip is not considered as a sexy attribute. Moreover, it is quite embarrassing as it looks very odd and bothers a lot. To make matters worse, girls with black hair on their upper lip sometimes end up looking like adolescent boys. Upper lip hair can result in a lost sense of self-confidence and self-worth in many girls. If you are also harassed by the hairline on your upper lip region, here is a relief. There are a number of methods available for getting rid of hair on the upper lip. While methods like electrolysis are permanent and costly, threading, waxing, and shaving are faster and less expensive ways to get rid of the unwanted hair. Before going for any method, it is important for you to consider the advantages and disadvantages of each. At the end, select the one that suits the cost, sensitivity of skin and time involved. Given here are some remedies for removing upper lip hair.

Remedies For Removing Upper Lip Hair

Tweezers
For those few noticeable hair on the upper lip, tweezing is the best way to pinch them out. This turns out to be the most inexpensive method to get rid of that unsightly lip hair. Since the area being treated is small, a simple tool like tweezers is enough to do the job. Though you might feel minor tingling initially, the pain will subside after a few minutes.


Threading
Threading is the most widely used method for removing upper lip hair. Though this option is a little painful, but it helps in getting rid of the tiniest and finest hair from the root. Once done, the hair is only visible after 15 days. Hence, threading is quite convenient and affordable.

Shaving
Shaving is another quick way to remove hair from the upper lip. While shaving, ensure that the razor is sharp to avoid any nicks or cuts of the skin. Shaving can cause razor burns and minor skin irritation, which can be reduced by applying aloe vera lotion to the area, after the entire process. But, the results of shaving lasts only for 5 to 7 days after which it has to be repeated again.

Waxing
Yet another method for getting rid of upper lip hair, waxing provides a long-lasting result with hair growing back after 20 to 25 days. Waxing is done using one of the different waxes available in the market like hot wax, cold wax, sugar wax, etc. A small amount of wax is applied to the upper lip area with a spatula. The region is then covered with a cotton cloth or cotton strip. The strip is pressed gently and pulled off at once. Though waxing can be quite painful, it gives you a hair-free and smooth looking skin thereafter.

Cream Depilatories
Cream depilatories are another way to remove the unwanted hair on your upper lip. The cream is first applied to the area and left for 10 to 15 minutes, giving you a bit of chemical burn feeling. Then the depilatories are used to rinse away the mush to give you a soft, smooth skin. Most depilatories come with an astringent or lotion-type product that is applied after hair removal to avoid skin irritation. Since this method removes hair only from the surface of the skin, the clear skin lasts only for 3 to 5 days.

Electrolysis
In case you are looking for a solution to get rid of the upper lip hair permanently, the above methods are not of use to you. Though they are very effective, you need to spend money and time again and again. It is here that electrolysis comes to your rescue, to remove hair permanently. The method destroys hair follicles using low voltage electricity. However, this permanent method requires you to pay a lot. When going for electrolysis, get it done by an experienced practitioner or a cosmetologist, as it can damage the skin and leave scars behind when done incorrectly.

Lip Exercises

Perfectly shaped and voluptuous lips are the desire of every girl. After all, plump lips and sexy pout like those of Angelina Jolie or Aishwarya Rai are sought after by women of all ages. However, the question is, how many minutes do you spend on perfecting your lips? Most of us give utmost attention to face, body, hands and feet every day, without caring about the lips. Though surgical solutions, such as botox and collagen injections assure us attractive and sexy lips, remember these solutions come tagged along with a number of side effects. Did you know that with a little planning and working out on your lips, you can provide the right texture and perfect shape to your lips as well. You can improve the tone of your lips and enlarge them by following some simple lip exercises given below. Go ahead and get those beautiful, succulent and plump lips in no time.

Exercises For Fuller Lips
  • Sit upright and place your lips and teeth together. Without opening your lips, smile as broad as you can and count till 15 before you relax. Pucker your lips to a pointed kiss. Repeat 10 times.
  • Sit straight and press your lips together. Lift your pressed lips towards your nose as close as you can. Retain the position while counting till 5. Relax and repeat 10 times.
  • Position your lips into a puckered kiss and retain the position for a while. Relax and pull your lips inside your mouth to get enclosed within the teeth. Hold the position counting till 10. Repeat the entire exercise 5 times.
  • Gently press your lips together and bring the corners of the mouth together inside your mouth as close as possible with your mouth muscles. Hold your lips in this position for 5 counts and relax. Repeat 5 times.
  • Sit casually with your lips slightly open. Pucker the lips outwards and pull the tops puckered lip towards the nose as close as possible. Hold the position for 10 counts and relax. Repeat the exercise 5 times.
  • Press your lips in over your teeth, as if you are preventing yourself from screaming. Using your index fingers, pull up the corners of the lips as you would, while indicating someone to smile. Keep this position for 5 seconds. Relax and repeat 10 times.
  • Open your mouth and stretch your lips out in front. Tightly close your lips and relax the face muscles. While keeping your mouth closed, move your lips to the right and then to the left. Thereafter, make a small eight with your lips. Repeat this sequence 5 times.
  • Stretch your lips out and breath out sharply, as your would to blow out a candle. Gently relax your lips and repeat 5 times.
  • Take a deep breath and puff up your cheeks. Then roll up your lips into a tube. Gradually, breathe out the air by pushing the air out with two-three blows.
  • Close your lips and curl them. Then, curl the lower lip over the lower jaw and open your mouth wide open, while moving the jaw up and down at the same time. Perform this exercise for 10 to 15 minutes per day.

How To Apply Lipstick That Lasts

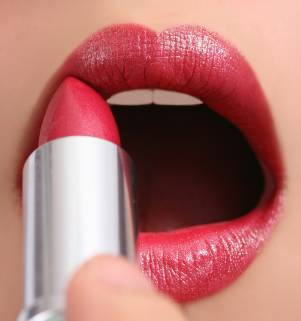
You apply lipstick every morning and head out to work. However, within an hour after applying lipstick you notice that your lips look like they could do with more lipstick! How does this happen? You’re clueless! Don’t worry yourself sick. There really is a path to get you out of your predicaments. As far as lipstick goes, it’s all about applying it a certain way. You can use the best lipstick, but if you’re not going to follow the right steps, you’re going to mostly have lips that always look like they could do with some color. Some people have the habit of just dabbing on some lipstick and rushing out to wherever. This is the biggest sin against the art of applying lipstick. Lipstick by itself has this tendency to come off easily and not applying it ‘systematically’ will only ruin the purpose of applying lipstick. Read on to know more on applying lipstick that lasts. 
Applying Lipstick That Lasts 
  • Finish applying makeup all over the face before starting off with your lipstick. This is as good as the basic and most important rule of applying lipstick that lasts. Applying lipstick before you’re done with the rest of your face may cause the lipstick to smudge or look untidy. This is exactly why most women apply lipstick only after they’re done with the rest of the face. Some women even apply lipstick right before they step out. This is done to show off lips that look as fresh as flowers.
  • Zero in on a lipstick color or shade of lipstick that complements your overall look and skin tone. Basically, use a lipstick that goes well with your makeup and the color of your skin. Choosing a lipstick shade that complements the natural color of your lips is the way to go. Satin and glossy finish lipsticks are best for glamorous evenings or night outs. Matte lipsticks give you that muted finish to throw filtered rays of light on your workday or regular makeup.
  • The best way to have your lipstick last for long is by treating your lips with moisture. Start off the process by applying a small amount of petroleum jelly or lip balm. This helps give your lips much needed moisture and will also help lipstick last longer.
  • You will need a lip liner for this step. Take the lip liner and draw a thin line around the edge of your lips. The line should be only one shade darker than your lipstick. Any darker and your lips will literally look like they have been drawn onto your face. Start at the centre of the upper lip and draw away from the starting point. Focus more within the edges of the lips to stress less on thicker lips and focus more on the outer edges to highlight thinner lips. Subtlety and a steady hand is what are important here.
  • Proceed to apply your chosen shade of lipstick from the tube. You can also use a small and effective lipstick brush. Apply the lipstick within the outlines of your lips. Make sure that you apply the lipstick evenly and try not to stray away from the edges of your lips. You will need a steady hand for this step too.
  • If at all there is any excess color on your lips, you can always blot out the same to get to a look of perfection